Nov 27, 2011

Social Contacts - Winter'12 Feature


Social Contacts - an awesome feature of winter'12. With Social Contacts you can view contact's social network profile in salesforce with just BUTTON CLICKS.


Some key points :


1) Easy access to contact's information, which indeed help in building strong relationships
2) Can view social information from several networks like "Twitter" , "Facebook" , "LinkedIn" (beta) etc
3) Saves time to login to other sites and view the information


To setup Social Contacts go to Setup > App Setup > Customize > Social Contacts > Settings > Enable all and click Save. We are ready to go.


Steps to follow :


1) Go to any contact


2) Click on Twitter icon 


3) Click "Sign in to Twitter"


4) It will show you the page with possible match
5) Select a profile, it will show the details of thr profile. Isn't that awesome?
To check the Security and Privacy when using Social Contacts, please refer : Social Contact Overview

Visualforce Charting - Winter 12 (Pilot)

Visualforce charting is in pilot. To enable this feature you need to contact salesforce.com. At this time it is not recommended that this feature be used in production code or managed packages.


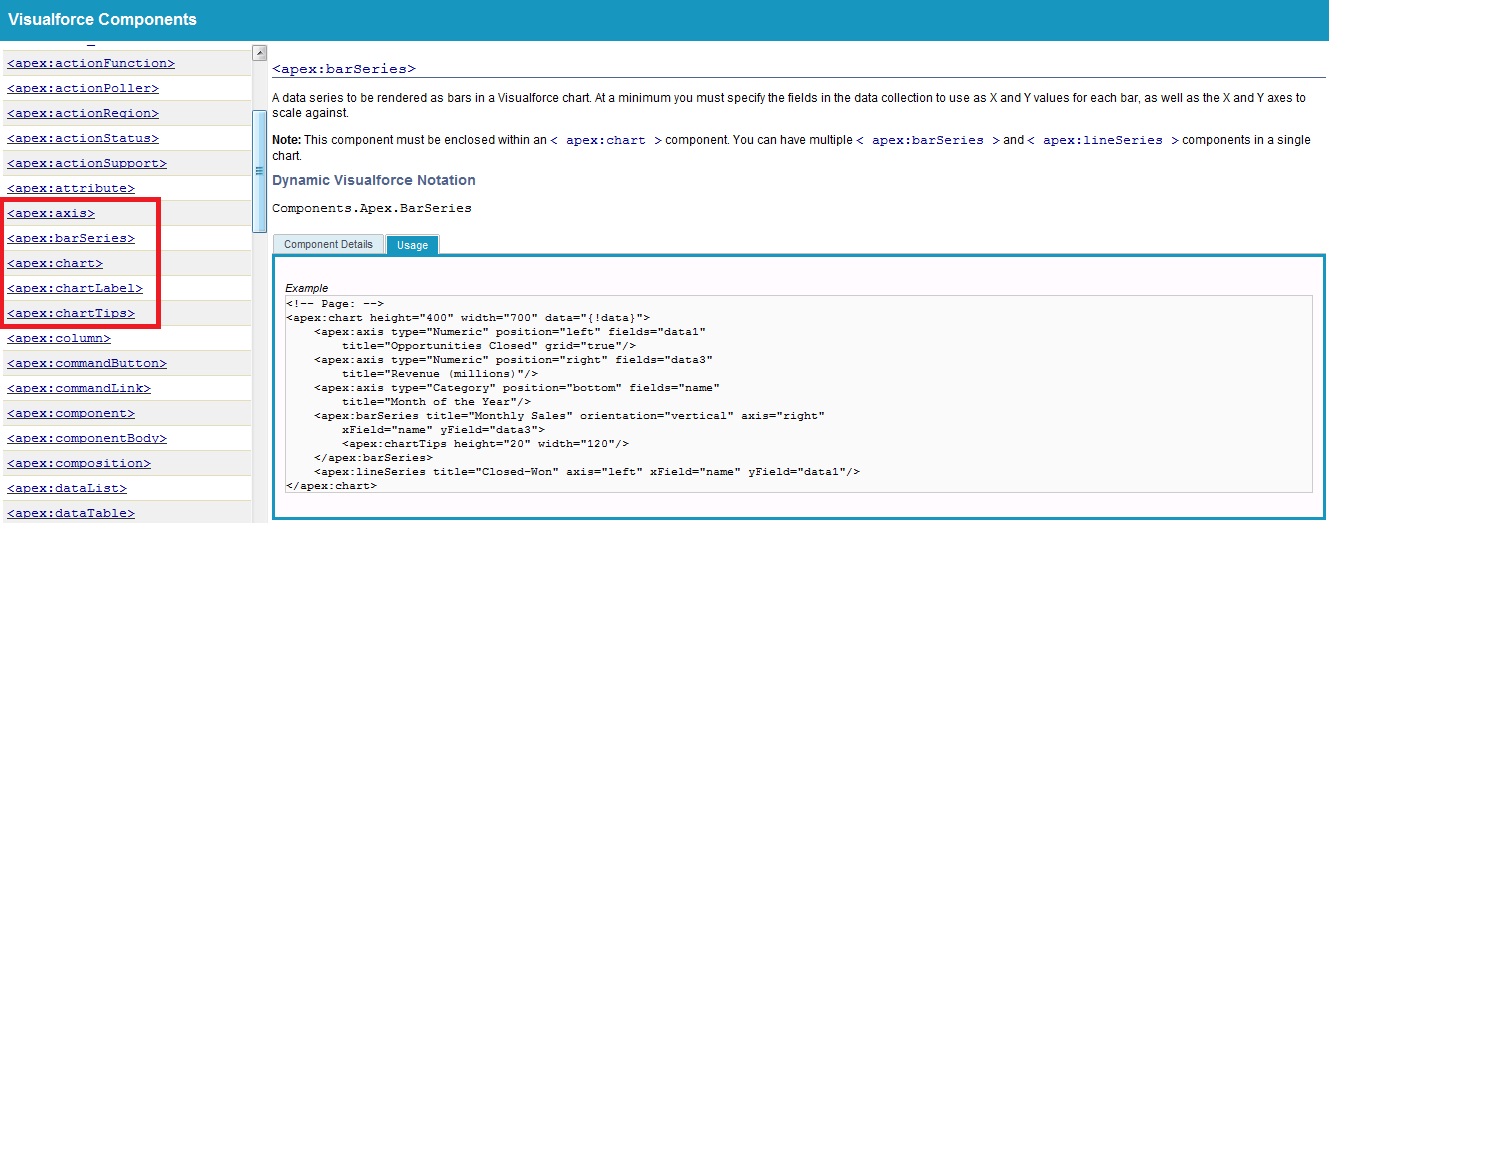
After enabling visualforce charting you are able to see the components in "Component Reference" which are used to create visualforce charts.


Right now if we need to display chart (pie,line,bar etc) we go for google charts, any charts or any third party charts. But with winter 12 release visualforce charting (pilot) is a way for you to create custom charts on your Visualforce pages(pie, bar, and line charts). Visualforce charts are rendered client-side using JavaScript. This allows charts to be animated and visually exciting, and chart data can load and reload asynchronously, which can make the page feel more responsive.


Right now visualforce charting offers variations on bar, line, and pie charts but if you like to use other charts then you can go with Google Charts


Limitations (As it is in pilot there are some limitation too)


  • Visualforce charts will only render in browsers which support scalable vector graphics (SVG).
  • Visualforce charting uses JavaScript to draw the charts. These charts won't display in pages rendered as PDFs.
  • Email clients do not generally support JavaScript execution in messages. Don't use Visualforce charting in email messages or email templates.
  • Visualforce charting sends errors and messages to the JavaScript console. You'll want to keep a JavaScript debugging tool, such as Firebug, active during development.


Creating a chart with Visualforce will require you to do two things:


  1. Write an Apex method that queries for, calculates, and wraps your chart data to send to the browser.
  2. Define your chart using the Visualforce charting components.


When the page containing the chart loads, the chart data is bound to a chart component, and the JavaScript that will draw the chart is generated. When the JavaScript executes, the chart is drawn in the browser. A Visualforce chart requires that you create a chart container component, which encloses at least one data series component.


Here is the simple example of using Pie Chart :


VFP :
<apex:page controller="PieChartController" title="Pie Chart"> 

    <apex:chart height="350" width="450" data="{!pieData}">
        <apex:pieSeries dataField="data" labelField="name"/>
        <apex:legend position="top"/>
    </apex:chart>

</apex:page>
Class :

public class PieChartController
{
    //For Pie Chart
    public List<PieWedgeData> getPieData()
    {
        List<PieWedgeData> data = new List<PieWedgeData>();
        data.add(new PieWedgeData('Jan', 30));
        data.add(new PieWedgeData('Feb', 15));
        data.add(new PieWedgeData('Mar', 10));
        data.add(new PieWedgeData('Apr', 20));
        data.add(new PieWedgeData('May', 20));
        data.add(new PieWedgeData('Jun', 5));
        return data;
    }

    // Wrapper class for Pie Chart
    public class PieWedgeData
    {
        public String name { get; set; }
        public Integer data { get; set; }

        public PieWedgeData(String name, Integer data) {
            this.name = name;
            this.data = data;
        }
    }
}

Resulting page looks like this :


Example of more complex Charts :


VFP :
<apex:page controller="ChartController">
    <apex:chart height="400" width="700" data="{!data}">
        <apex:legend position="right"/>
        <apex:axis type="Numeric" position="left" fields="data1"
            title="Opportunities Closed" grid="true"/>
        <apex:axis type="Numeric" position="right" fields="data3"
            title="Revenue (millions)"/>
        <apex:axis type="Category" position="bottom" fields="name"
            title="Month of the Year">
            <apex:chartLabel rotate="315"/>
        </apex:axis>
        <apex:barSeries title="Monthly Sales" orientation="vertical" axis="right"
            xField="name" yField="data3">
            <apex:chartTips height="20" width="120"/>
        </apex:barSeries>
        <apex:lineSeries title="Closed-Won" axis="left" xField="name" yField="data1"
            fill="true" markerType="cross" markerSize="4" markerFill="#FF0000"/>
        <apex:lineSeries title="Closed-Lost" axis="left" xField="name" yField="data2"
            markerType="circle" markerSize="4" markerFill="#8E35EF"/>
    </apex:chart>
</apex:page>
Class :

public class ChartController {
    // Return a list of data points for a chart
    public List<Data> getData() {
        List<Data> data = new List<Data>();
        data.add(new Data('Jan', 30, 90, 55));
        data.add(new Data('Feb', 44, 15, 65));
        data.add(new Data('Mar', 25, 32, 75));
        data.add(new Data('Apr', 74, 28, 85));
        data.add(new Data('May', 65, 51, 95));
        data.add(new Data('Jun', 33, 45, 99));
        data.add(new Data('Jul', 92, 82, 60));
        data.add(new Data('Aug', 87, 73, 45));
        data.add(new Data('Sep', 34, 65, 55));
        data.add(new Data('Oct', 78, 66, 56));
        data.add(new Data('Nov', 80, 67, 53));
        data.add(new Data('Dec', 17, 70, 70));
        return data;
    }

    // Wrapper class
    public class Data {
        public String name { get; set; }
        public Integer data1 { get; set; }
        public Integer data2 { get; set; }
        public Integer data3 { get; set; }
        public Data(String name, Integer data1, Integer data2, Integer data3) {
            this.name = name;
            this.data1 = data1;
            this.data2 = data2;
            this.data3 = data3;
        }
    }
}

Resulting page looks like this :


As it is in pilot, so will soon come up with more real time examples and scenarios, stay tuned.


More Reference :
Quick Look at Visualforce Charting
Building a Complex Chart with Visualforce Charting
How Visualforce Charting Works

Aug 4, 2011

Inserting sObject Dynamically in Salesforce

I spend most of my time over Community, best place to learn and share knowledge. There are many questions related to sObject, and out of all a very interesting one is "How I can insert sObject record dynamically?"


I will provide a user interface with two text fields which will take "Object Name" and "Record Name" as string from user. And when I click on Save the record with Name entered should be inserted in the provided Object. Is this possible, of-course it is.


Here is the Visualforce Page code :
<apex:page controller="InsertDynamicSobjectController">
    <apex:form >
        <apex:pageBlock >
            <apex:pageBlockButtons >
                <apex:commandButton value="Save" action="{!Save}"/>
            </apex:pageBlockButtons>
            <apex:pageMessages />
            <apex:pageBlockSection >
                <apex:pageBlockSectionItem >
                    <apex:outputLabel value="Enter Object Name"/>
                    <apex:inputText value="{!ObjectName}"/>
                </apex:pageBlockSectionItem>
                <apex:pageBlockSectionItem >
                    <apex:outputLabel value="Enter Name for Record"/>
                    <apex:inputText value="{!RecordName}"/>
                </apex:pageBlockSectionItem>
            </apex:pageBlockSection>
        </apex:pageBlock>
    </apex:form>
</apex:page>

Here is the Apex Code :
public class InsertDynamicSobjectController
{
    public String ObjectName {get; set;}
    
    public String RecordName {get; set;}
    
    public InsertDynamicSobjectController()
    {
        ObjectName = '' ;
        RecordName = '' ;
    }
    
    public PageReference Save()
    {
        //use GlobalDecribe to get a list of all available Objects
        Map gd = Schema.getGlobalDescribe();
        Set objectKeys = gd.keySet();
        if(objectKeys.contains(Objectname.toLowerCase()))
        {
            try
            {
                //Creating a new sObject
                sObject sObj = Schema.getGlobalDescribe().get(ObjectName).newSObject() ;
                sObj.put('name' , RecordName) ;
                insert sObj ;
                
                PageReference pg = new PageReference('/'+sObj.Id) ;
                return pg ;
            }
            Catch(Exception e)
            {
                ApexPages.addMessages(e) ;
                return null ;
            }
        }
        else
        {
            ApexPages.addmessage(new ApexPages.message(ApexPages.severity.ERROR,'Object API name is invalid')) ;
            return null ;
        }
    }
}


Code provided is flexible and you can extend it according to your need.

Jul 7, 2011

Binding Values of Map on Visualforce Page

I was totally messed up with this and thanks to Bob Buzzard for providing me the solution to it.


What exactly the problem is? I was trying to display values of Map on visualforce page. This code snippet will help you to understand more.
<apex:repeat value="{!MyMap}" var="M">
 <apex:repeat value="{!MyMap[M]}" var="temp">
  <apex:outputLabel value="{!temp.Test_Curr__c}"/>
 </apex:repeat>
</apex:repeat>
"MyMap" is in my controller having list of account (Map<String , List<Account>>). I just want to bind the currency field value of account with outPutField like this :
<apex:repeat value="{!MyMap}" var="M">
 <apex:repeat value="{!MyMap[M]}" var="temp">
         <apex:outputField value="{!temp.Test_Curr__c}"/>
 </apex:repeat>
</apex:repeat>
But compiler gifted me this : "Error: Could not resolve the entity from <apex:outputField> value binding '{!temp.Test_Curr__c}'. outputField can only be used with SObject fields."


Now it is mandatory for me to bind the value with outPutField as I want the formatting of currency field on my visualforce page.


Using outPutLabel doesn't provide formatting either :
<apex:repeat value="{!MyMap}" var="M">
 <apex:repeat value="{!MyMap[M]}" var="temp">
  <apex:outputLabel value="{!temp.Test_Curr__c}"/>
 </apex:repeat>
</apex:repeat>
So finally I need the Community help, and trust me it is the best place to get your answers quickly.


Workaround for this is using <apex:column> as it provides the sObject field behaviour. So my final code looks something like this :
<apex:pageBlockTable value="{!MyMap}" var="M">
 <apex:repeat value="{!MyMap[M]}" var="temp">
  <apex:column value="{!temp.Test_Curr__c}" />
 </apex:repeat>
</apex:pageBlockTable>
For reference click here to get community post.


Hope this flaw will be fixed soon as there might be some cases where we do not want to use pageBlockTabel.


Cheers

Jun 27, 2011

Display Picture in Contact

What if I want to display my image on contact, and I frequently change it also. The answer in general is, create a visualforce page page and override it to native contact detail page.


This doesn't sounds good to me, am not happy overriding native pages provided by Salesforce. So I finally decided to put my head together and think how I can do this in another way.


Idea came in mind that what if I use Notes and Attachments on Contact object. Yes! I have uploaded some of my pictures in Notes and Attachment and provided a button on detail page to select one of them.


When you click on the "Set Profile Picture" a pop up gets open where all valid images are shown with radio option as shown in above screen. Selected image is displayed on contact like this,


How can you implement this?? Follow some simple steps.

Make sure you copy all Labels, Names etc correctly.


1) Create field of Type : "Text" with Field Label : "StoreImageUrl" and Field Name : "StoreImageUrl" (Lenght - 255) -> Make it visible to all profiles but do not show this on any page layout. This is for internal use only.


2) Create another field of Type : "Formula" with Field Label : "&nbsp" and Field Name : "Image" with return type "Text"


Formula will contain
IF( StoreImageUrl__c != null , IMAGE( StoreImageUrl__c , '' , 100 , 100 ) , IMAGE('' , '' , 0 , 0))
Make it visible for all profiles and show it at top on all layouts.


3) Create an Apex Class
public class DisplayImagesController
{
    //Parent Contact
    private String ContactId ;
    //Image selected from UI
    public String selectedImage {get; set;}
    
    public DisplayImagesController()
    {
        //Fetching contact Id
        ContactId = ApexPages.CurrentPage().getParameters().get('Id') ;
        selectedImage = '' ;
    }
    
    public boolean validateImage(String image)
    {
        String Regex = '([^\\s]+(\\.(?i)(jpg|png|gif|bmp))$)';
        Pattern MyPattern = Pattern.compile(Regex);
        Matcher MyMatcher = MyPattern.matcher(image);
        return MyMatcher.matches() ;
    }
    
    public List<SelectOption> getItems()
    {
        List<SelectOption> options = new List<SelectOption>(); 
        
        //All attachments related to contact
        List<Attachment> attachLst = [SELECT Id , Name FROM Attachment WHERE ParentId =: ContactId] ;
        
        //Creating option list
        for(Attachment att : attachLst)
        {
            String imageName = att.name.toLowerCase() ;
            if(validateImage(imageName))
            {
                options.add(new SelectOption(att.Id , att.Name));
            }
        }
        
        return options ;
    }
    
    public PageReference SaveImage()
    {
        //Contact to update
        List<Contact> conToUpdate = new List<Contact>() ;
        conToUpdate = [select id,StoreImageUrl__c from contact where id =: ContactId] ;

        //Inserting image parth
        if(conToUpdate.size() > 0)
        {
            conToUpdate[0].StoreImageUrl__c = 'https://c.ap1.content.force.com/servlet/servlet.FileDownload?file=' + selectedImage ;
            update conToUpdate[0] ;
        }
        return null ;
    }
}


4) Create a visualforce page with Label and Name "DisplayImages"
<apex:page id="pg" controller="DisplayImagesController" sidebar="false" showHeader="false">
<script>
    function validateRadio()
    {
        var elLength = document.getElementById('pg:frm:pb:pbs:pbsi:selectR');
        var childInputElements = elLength.getElementsByTagName('input');
        var flag = false ;
        for(var i=0; i < childInputElements.length; i++)
        {
            if(childInputElements[i].checked == true)
                {
                    flag = true ;
                    break
                }
        }
        if(!flag)
        {
            alert('Please select one Picture') ;
            return false ;
        }
        else
        {
            Validate() ;
        }
    }
</script>
<apex:form id="frm">
    <apex:actionFunction name="Validate" action="{!SaveImage}" onComplete="alert('Picture is Applied'); window.close();" reRender=""/>
    <apex:pageBlock id="pb" title="Contact" tabStyle="Contact">

        <apex:pageBlockButtons >
            <apex:commandButton rendered="{!IF(Items.size > 0 , true , false)}" value="Save" onClick="return validateRadio() ;"/>
            <apex:commandButton value="Cancel" onClick="window.close() ;"/>
        </apex:pageBlockButtons>

        <apex:pageBlockSection id="pbs" title="All Images" rendered="{!IF(Items.size > 0 , true , false)}">
            <apex:pageBlockSectionItem id="pbsi">
                <apex:selectRadio id="selectR" value="{!selectedImage}">
                    <apex:selectOptions id="MyRadio" value="{!Items}" />
                </apex:selectRadio>
            </apex:pageBlockSectionItem>
        </apex:pageBlockSection>

        <apex:pageBlockSection rendered="{!IF(Items.size > 0 , false , true)}">
            <apex:outputLabel value="No attachments to display or there is no valid image in attachments."/>
        </apex:pageBlockSection>

    </apex:pageBlock>
</apex:form>
</apex:page>


5) Create a Detail Page button with Label : "Set Profile Picture" and Name : "Set_Profile_Picture", Behavior : "Execute Java Script" and Content Source : "OnClick JavaScript"
window.showModalDialog('/apex/DisplayImages?Id={!Contact.Id}','') ; 
window.location.href = window.location.href ;


6) Edit the contact layout and add "Set Profile Picture" button.


7) Create a contact and add some images in notes and attachments, click on "Set Profile Picture". Select the image and click save.


*Note : I hate using JS with IE.


Also you may have to change a line of the Apex code above : "https://c.ap1.content.force.com/servlet/servlet.FileDownload?file=' + selectedImage ;"


in "SaveImage()" method.


Above path can be different on different organizations, so you just need to make sure that this is correct by :
View the attachment uploaded and copy the path from the URL except the ID.You can also create a custom setting to store this path.


Once above steps are done we are all set to go.


Cheers.

Jun 19, 2011

Summer 11 Features - Part 2 (JavaScript Remoting)

One of the major enhancements from visualforce this release(Summer 11) and my favorite is JavaScript remoting.


JavaScript Remoting is the ability to invoke apex class method from javascript embedded in a visualforce page. JavaScript Remoting is now available after summer 11 release.


Here is a quick example : we have a Apex class which defines a get Account method.
global with sharing class MyJSRemoting
{
    public static Account account { get; set; }
     
    @RemoteAction
    global static Account getAccount(String accountName) {
        account = [select id, name, phone, type, numberofemployees from 
             Account where name = :accountName limit 1];
        return account;
    }   
}
This method is having @RemoteAction annotation making it available to be called from a visualforce page. Now in our visualforce page we have a script tag set which is how we embed javascript within visualforce pages.


This JavaScript code then invokes the getAccount method in the apex class to take action.


Please note I have used namespace "ankit.MyJSRemoting" as there is a namespace registered on my organization.

JavaScript Remoting is the feature which is primarily be used by developers and will allow them to create richer and more interactive user interfaces that everyone will benefit from.

In particular, lets developers create rich javascript based user interfaces by invoking apex controller methods within JavaScript code. JavaScript is typically used to render small parts of user interface. Result from a Javascript remoting call are much faster then using a typical visualforce reRender model, developers can provide more instant feedback to the user. This is because remoting calls are stateless. Means only data is set back and forth instead a lot of bulky HTML.

Additional Visualforce enhancements :

1) Filtered Lookup via Visualforce.
2) Inline editing for rich text area field.
3) Field Set property accessors.

Summer 11 Features - Part 1 (Enhanced Profile User Interface)

Enhanced Profile User Interface brings a new way of creating, editing and viewing user profiles. Existing profile interface groups together settings and permission by type in a long scrolling detail page for example page layout assignment for all object are grouped in one section, field level security settings in another and object permissions in another. This involves a lot of scrolling and visits to modify multiple sections.


How to enable "Enhanced Profile User Interface" : Set Up > App Set Up > Customize > User Interface > Check "Enable Enhanced Profile User Interface"


Enabling enhanced profile user interface addresses these limitations which provides a clean overview page from where you can easily access the setting and permissions you need.


For example "Find Setting" box at the top let you quickly find the objects tabs and permissions you want to view or modify.


Similarly "Apps" and "System" section have different gain grounds.


Key benefits of enhanced profile user interface :


1) Quickly find individual settings and permissions (Using Find Settings at top)
2) Easily set up profiles for users with a particular job role.
3) Quickly modify settings and permissions for new custom objects


Cheers